Arduino Setup
Running pywfom requires first setting up an Arduino
to be used with the system.
Installing the Arduino IDE & Drivers
Download the Arduino IDE for your Operating System and follow the instructions on your screen.
Any required USB Drivers will be installed alongside the Arduino IDE.
Deploying to the Arduino
Attach the Arduino you wish to use with your
pywfomsystem to your machine via USB.
NOTE: Arduino MEGA is suggested
Download the pyWFOM Arduino File
Start the Arduino IDE, and open the pyWFOM Arduino File
Verify the correct device and port are selected
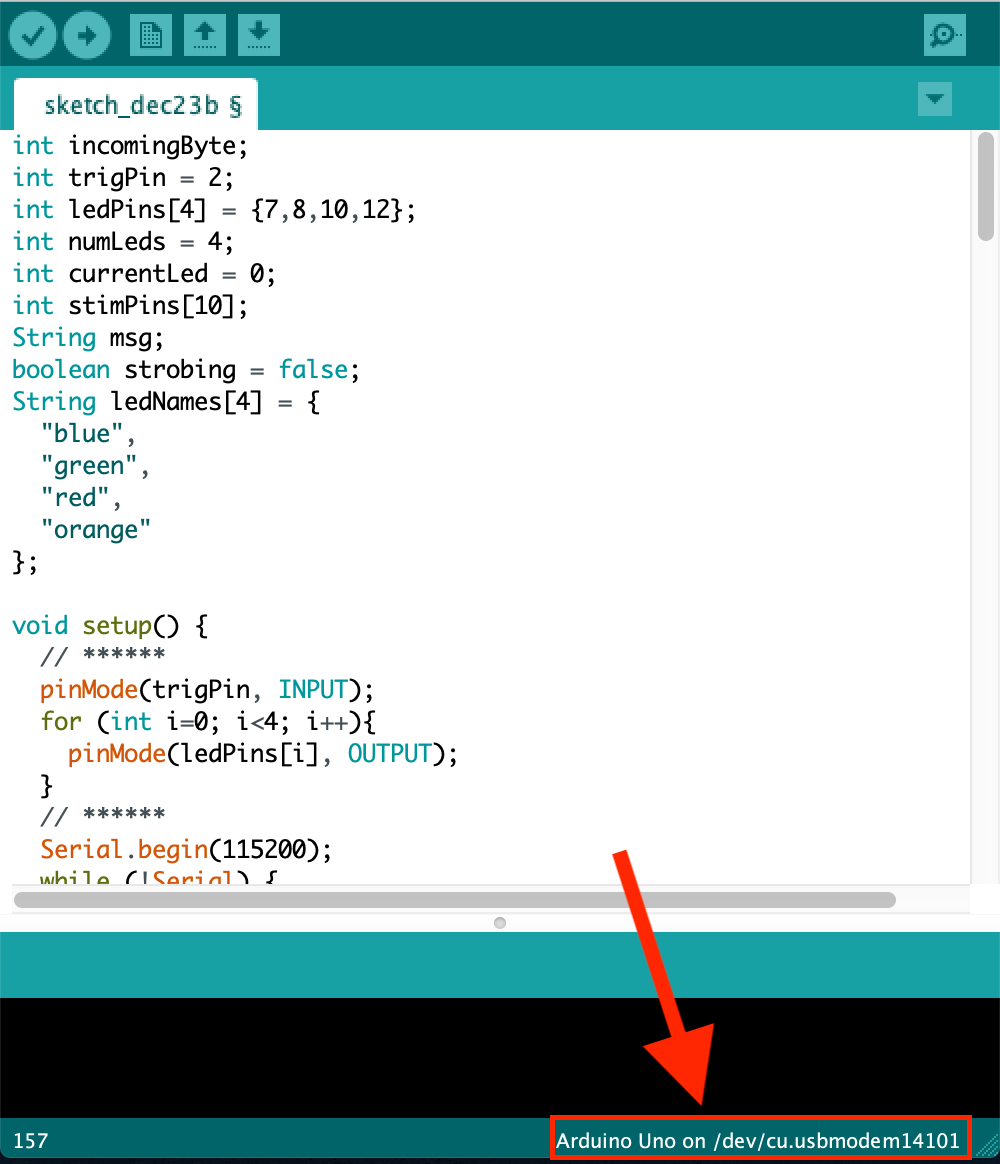
These can be changed from the Tools Menu
Deploy the code to the Arduino
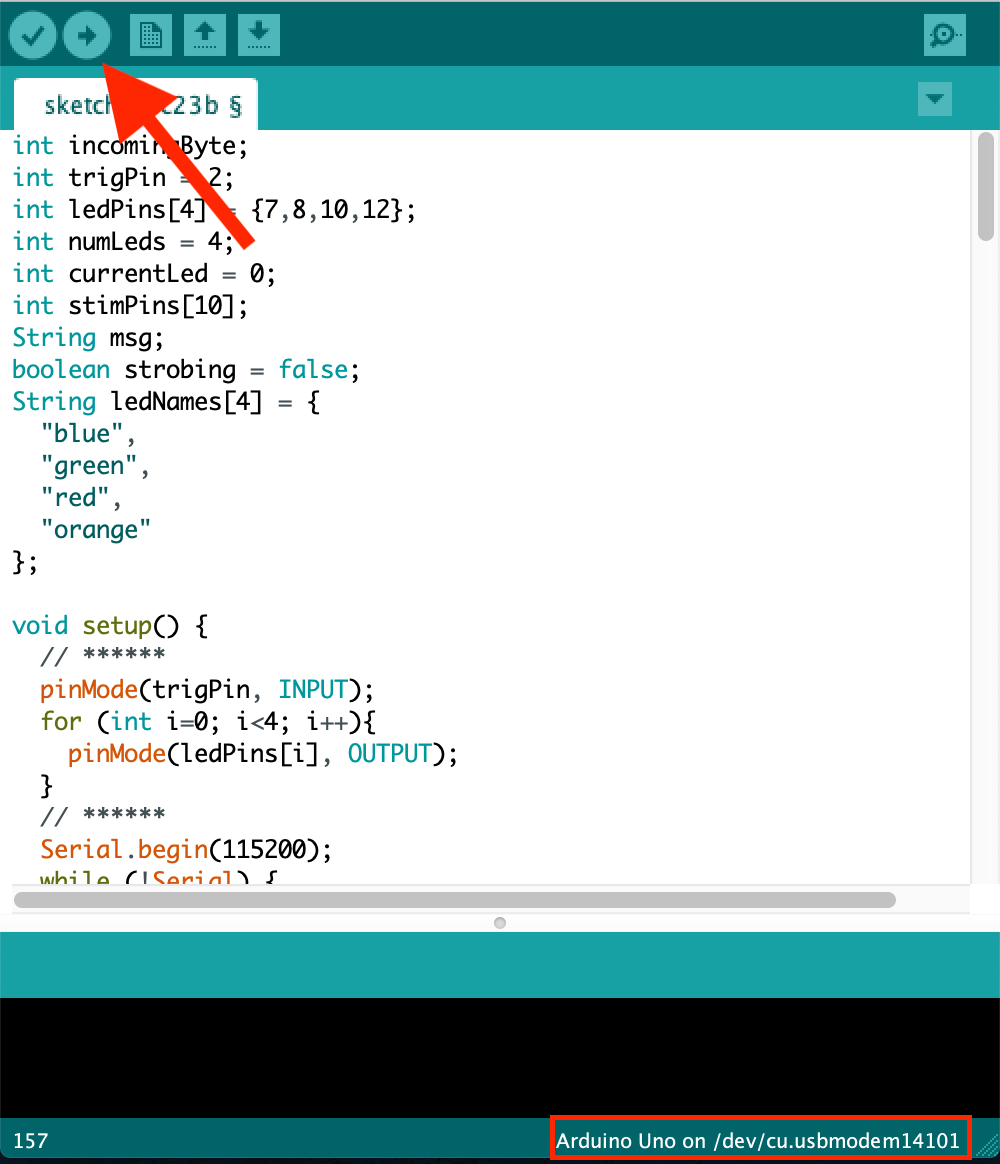
Wait until the code successfully deploys
pywfomis now able to send settings to your Arduino
Attaching Devices
Adding devices to your pywfom system is as simple as attaching them
to the pins of your Arduino.
The example below shows 3 separate BNC connectors attached to an exposure trigger from a sCMOS camera and two LED drivers.

Simple wiring diagram including a single sCMOS Camera and 2 LEDs
pywfom would send this information to the Arduino using the
strobing setting in config.json.
Take a look at the section on the JSON Configuration File.
{
  "strobing": {
    "leds":[
      {
        "name":"led1",
        "pin":2
      },
      {
        "name":"led2",
        "pin":5
      }
    ],
    "trigger":11
  ]
}